Introduction
French drains are an effective drainage solution used to divert water away from buildings, yards, and other areas prone to water accumulation. Whether you’re dealing with a soggy lawn, basement flooding, or waterlogged landscapes, installing a French drain can help mitigate water damage and prevent structural issues. In this comprehensive guide, we’ll explore the process of French drain installation, from planning and preparation to execution and maintenance.
What is a French Drain?
A French drain is a trench filled with gravel or rock and perforated pipe designed to redirect groundwater away from a specific area. The drain utilizes gravity to channel water downhill and prevent it from pooling around foundations, basements, or landscaping features. French drains are particularly useful in areas with poor soil drainage or frequent rainfall, helping to protect structures and landscapes from water-related damage.
Benefits of French Drain Installation
The installation of a French drain offers several advantages, including:
Prevents Water Damage:
By diverting water away from vulnerable areas, French drains help prevent basement flooding, foundation damage, and soil erosion.
Improves Soil Drainage:
French drains enhance soil drainage by facilitating the rapid removal of excess water, promoting healthier plant growth and preventing waterlogging.
Reduces Hydrostatic Pressure:
By relieving hydrostatic pressure against basement walls and foundations, French drains minimize the risk of structural damage and moisture infiltration.
Enhances Property Value:
Installing a French drain can increase the resale value of your property by addressing drainage issues and improving overall landscaping aesthetics.
Planning for French Drain Installation
Before embarking on a French drain installation project, careful planning and preparation are essential. Consider the following factors:
Identify Problem Areas:
Assess your property to determine areas prone to water accumulation, such as low-lying areas, slopes, or areas near downspouts.
Determine Drainage Route:
Plan the drainage route to ensure water is redirected away from buildings and landscaping features to an appropriate outlet, such as a storm drain or dry well.
Choose Drainage Materials:
Select the appropriate materials for your French drain, including perforated pipe, gravel or rock, geotextile fabric, and drainage fittings.
Obtain Permits:
Check local building codes and regulations to determine if permits are required for French drain installation. Obtain necessary permits before starting the project.
Steps for French Drain Installation
Once you’ve completed the planning phase, follow these steps to install a French drain:
Mark Trench Location
Using spray paint or stakes, mark the outline of the trench where the French drain will be installed. Ensure the trench slopes away from the desired drainage outlet at a minimum gradient of 1% for proper water flow.
Excavate Trench
Using a shovel or trenching machine, excavate the trench along the marked outline to the desired depth and width. The trench depth will depend on the drainage requirements and the size of the perforated pipe.
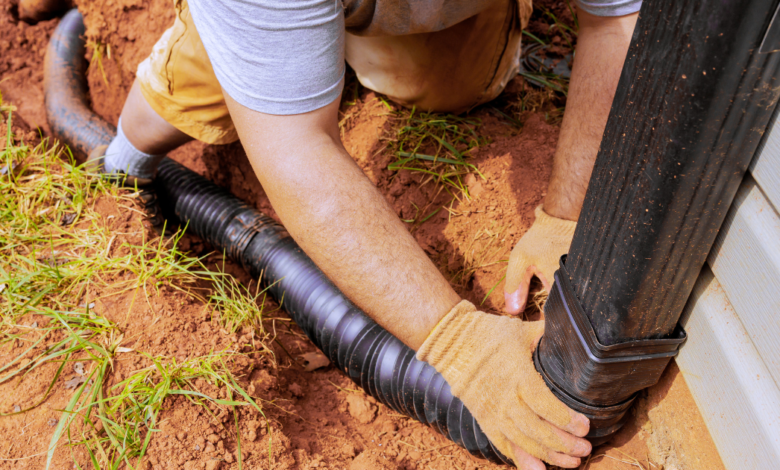
Install Perforated Pipe
Place a layer of gravel or rock at the bottom of the trench to provide a stable base for the perforated pipe. Lay the perforated pipe along the length of the trench, ensuring it slopes downward towards the drainage outlet.
Cover Pipe with Gravel
Cover the perforated pipe with additional gravel or rock, ensuring the pipe is completely surrounded and covered. The gravel acts as a filter, allowing water to enter the pipe while preventing soil and debris from clogging the drainage system.
Wrap with Geotextile Fabric
Optional: Wrap the perforated pipe and gravel in geotextile fabric to further prevent soil infiltration and prolong the lifespan of the French drain. Secure the fabric with landscaping staples or tape.
Backfill Trench
Backfill the trench with soil, ensuring it is compacted evenly to prevent settling or sinkholes. Slope the soil away from buildings and structures to encourage proper water drainage.
Test Drainage System
Once the French drain is installed, test the drainage system by flushing it with water or waiting for rainfall. Ensure water flows freely through the perforated pipe and exits the drainage outlet as intended.
Maintenance of French Drains
To ensure optimal performance and longevity, regular maintenance of French drains is essential. Here are some maintenance tips:
Inspect Annually:
Conduct annual inspections of the French drain to check for signs of clogging, damage, or sediment buildup.
Clear Debris:
Remove any debris, leaves, or vegetation that may obstruct the drainage system and impede water flow.
Monitor Outlet:
Keep the drainage outlet clear of obstructions to allow water to discharge freely.
Repair Damage:
Promptly repair any damage to the French drain, such as pipe cracks, loose fittings, or erosion along the trench.
Reapply Gravel:
Periodically add additional gravel or rock to replenish the drainage layer and maintain proper drainage capacity.
Conclusion
French drain installation is a highly effective solution for managing water drainage issues around homes, buildings, and landscapes. By following the planning steps and installation process outlined in this guide, homeowners can successfully implement French drains to mitigate water damage and improve property drainage. Regular maintenance and monitoring are key to ensuring the continued functionality of French drains and protecting your property from the adverse effects of water accumulation. With proper installation and care, French drains can provide long-lasting relief from drainage problems and enhance the overall health and safety of your outdoor environment.